
No doubt, Wordfence is one of the best WordPress security plugins available at the moment. I know how much this plugin can get in detail confusing the WordPress newbies out there and taking too much time in setting it. That is why I have made this Wordfence guide with the best-optimized settings available. So let’s get into it:
- Why I'm So Obsessed with Wordfence?
- Wordfence Guide | How To Install Wordfence on WordPress
- Wordfence Guide 2022 | Configuring Wordfence With The Best Settings
- Wordfence Guide | Setting up Your Firewall
- Wordfence Guide | How To Stop Bad Bots & Crawlers From Consuming Your Server Resources & Bandwidth
- Wordfence Guide | Setting Scan Scheduling & Configuration
- Wordfence Guide | Setting Live Traffic Configuration in Tool Options
- Wordfence Guide | How To Set Wordfence 2FA (two-factor authentication)
- FAQs
Why I’m So Obsessed with Wordfence?
From the day I first stumbled upon Wordfence back in 2018 till now it hasn’t changed my mind to move to any other security plugin. This thing is literally the ONLY security plugin you will ever need for your WordPress.
- 2FA wp-login with captcha verification
- A firewall with over 100+ rules against SQL injections, XSS cross-site scripting, and more.
- Manual and auto scan with different sensitivity levels to check for malware in server files and other vulnerabilities
- Customizable brute force protection for your WordPress login page
- Rate limiting to stop bad bots from utilizing your server resources/bandwidth and only allow the important ones
- Customizable email alerts
- 1 click hide WordPress version, 1 click disable code execution in the uploads directory
- View live traffic with the filter (all or security traffic) with the URL of the page visited along with time, IP address, hostname, and response code
I love to go a total freebie, so all these Wordfence features I mentioned are in the FREE version! Honestly, moving to this plugin allowed me to ditch 4 security plugins that I used for security (Captcha verification, a standard plugin with firewall and scan, a plugin for 2FA for logins, and a plugin for tweaks like hiding WP version). As a result, I was able to manage all these in one place and decrease the plugin mess and server load as well.
That is why on Reddit or on Quora I recommend using this and only this plugin to manage your Wordfence security.
Wordfence Guide | How To Install Wordfence on WordPress
Now let’s start with the Wordfence guide. Starting with the first question of ‘How to install Wordfence on your WordPress?’. There are two ways to install any plugin:
- Method 1: To install by going to Dashboard > Plugins > Add New > Search for the plugin and install it
- Method 2: Download the plugin .ZIP file from here and upload it to > Plugins > Add New > clicking on Upload Button (located on the top most section)
Method 1 is considered the safest and most used one. Let’s follow this.
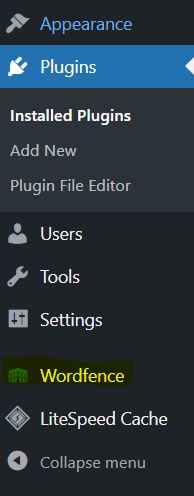
Step 1: From your dashboard, (look at the left column) and go to Plugins > Add New
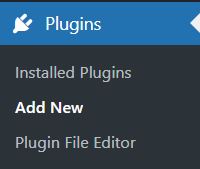
Step 2: Go to the search bar on the top right and search for ‘Wordfence’.
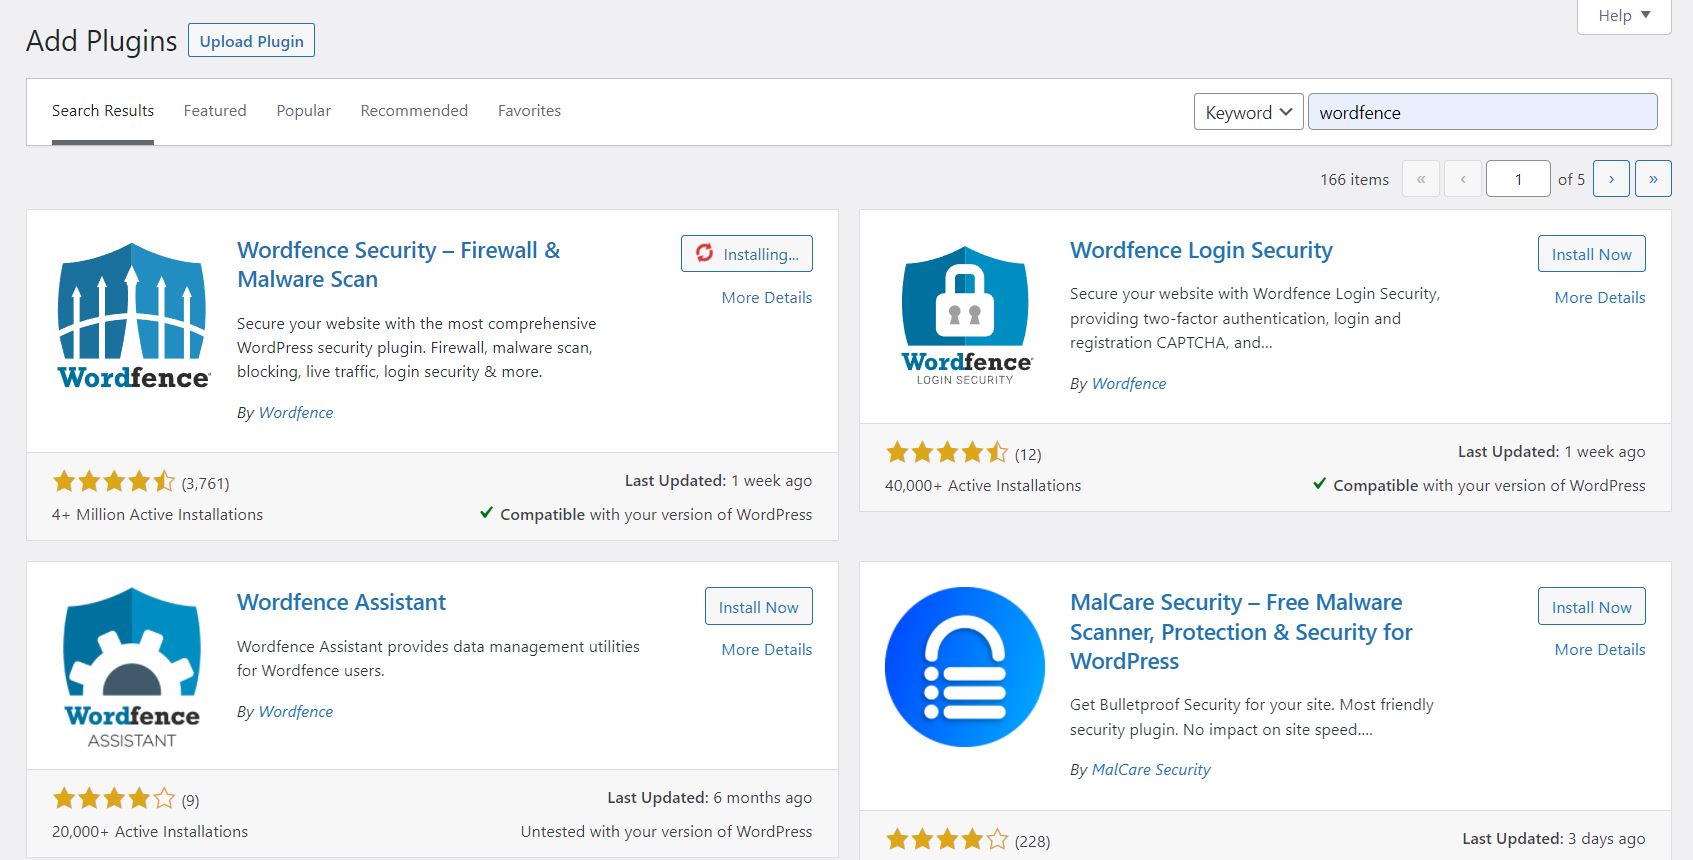
Step 3: The first plugin with the name ‘Wordfence Security’ will appear in the search. Click the ‘Install’ button.
Step 4: When the installation is completed, click the button ‘Activate’ now visible.
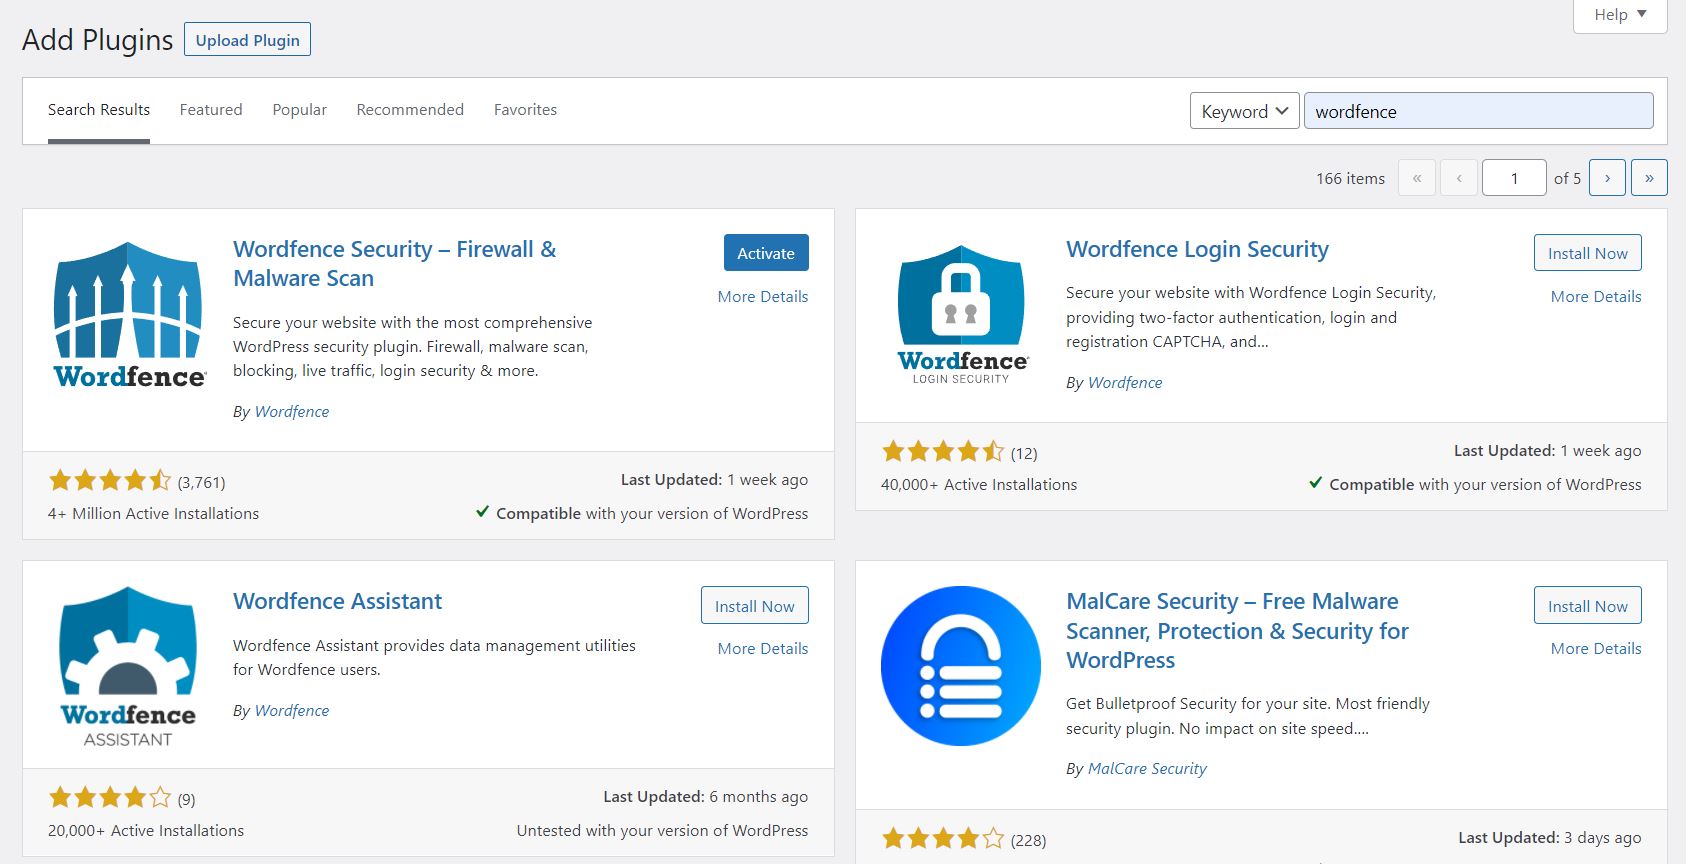
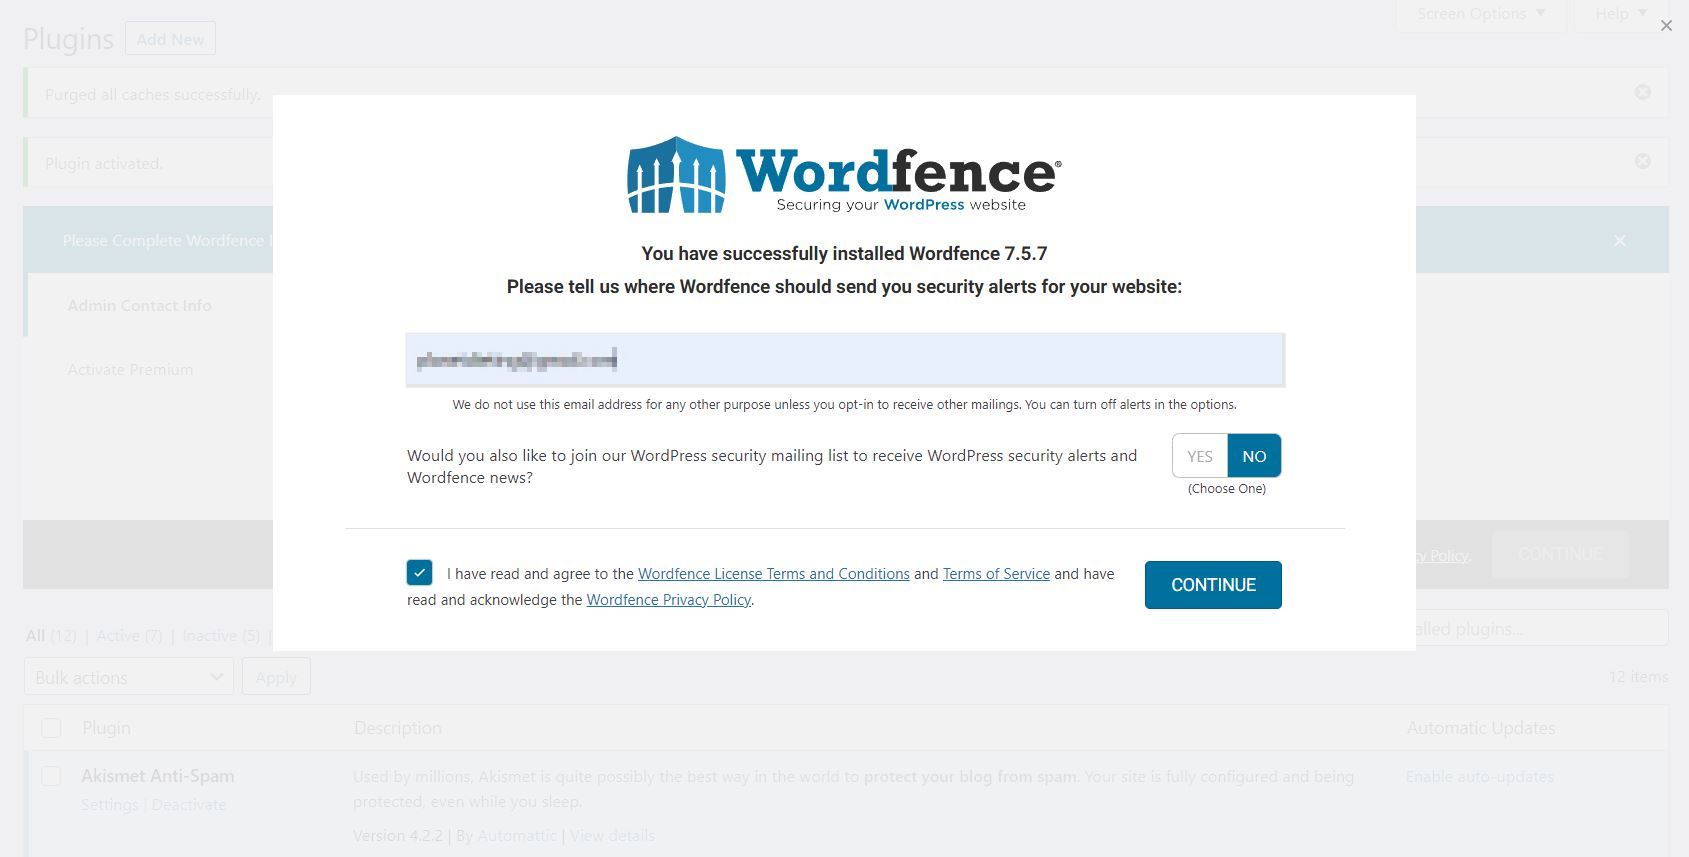
Step 5: When activated the page will be redirected to the installed plugins page with the Wordfence screen to add email so that recent activities, attacks, plugin upgrades, and logins (all optional and can be customized later).
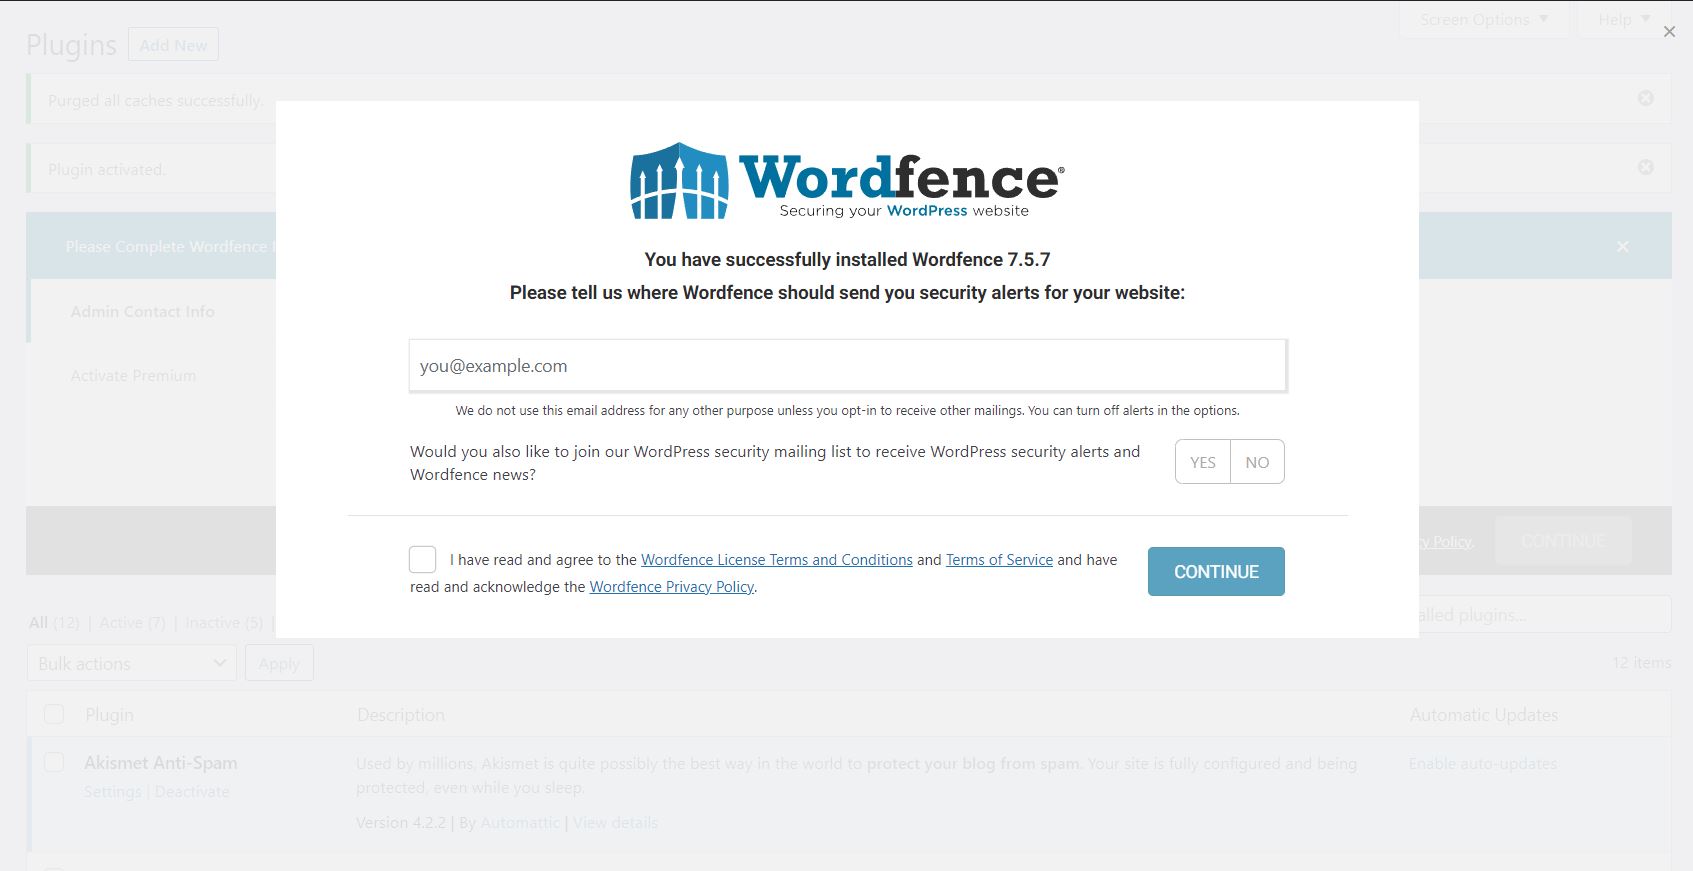
Step 6: Write your email, and select the option whether you want to receive Wordfence news or not (Yes/No). Tick the terms and conditions. Click the ‘Continue’ button.
Step 7: The screen will ask you whether you want to add a premium key (if you have purchased Wordfence premium) or continue with the free version. Click on ‘No thanks’.
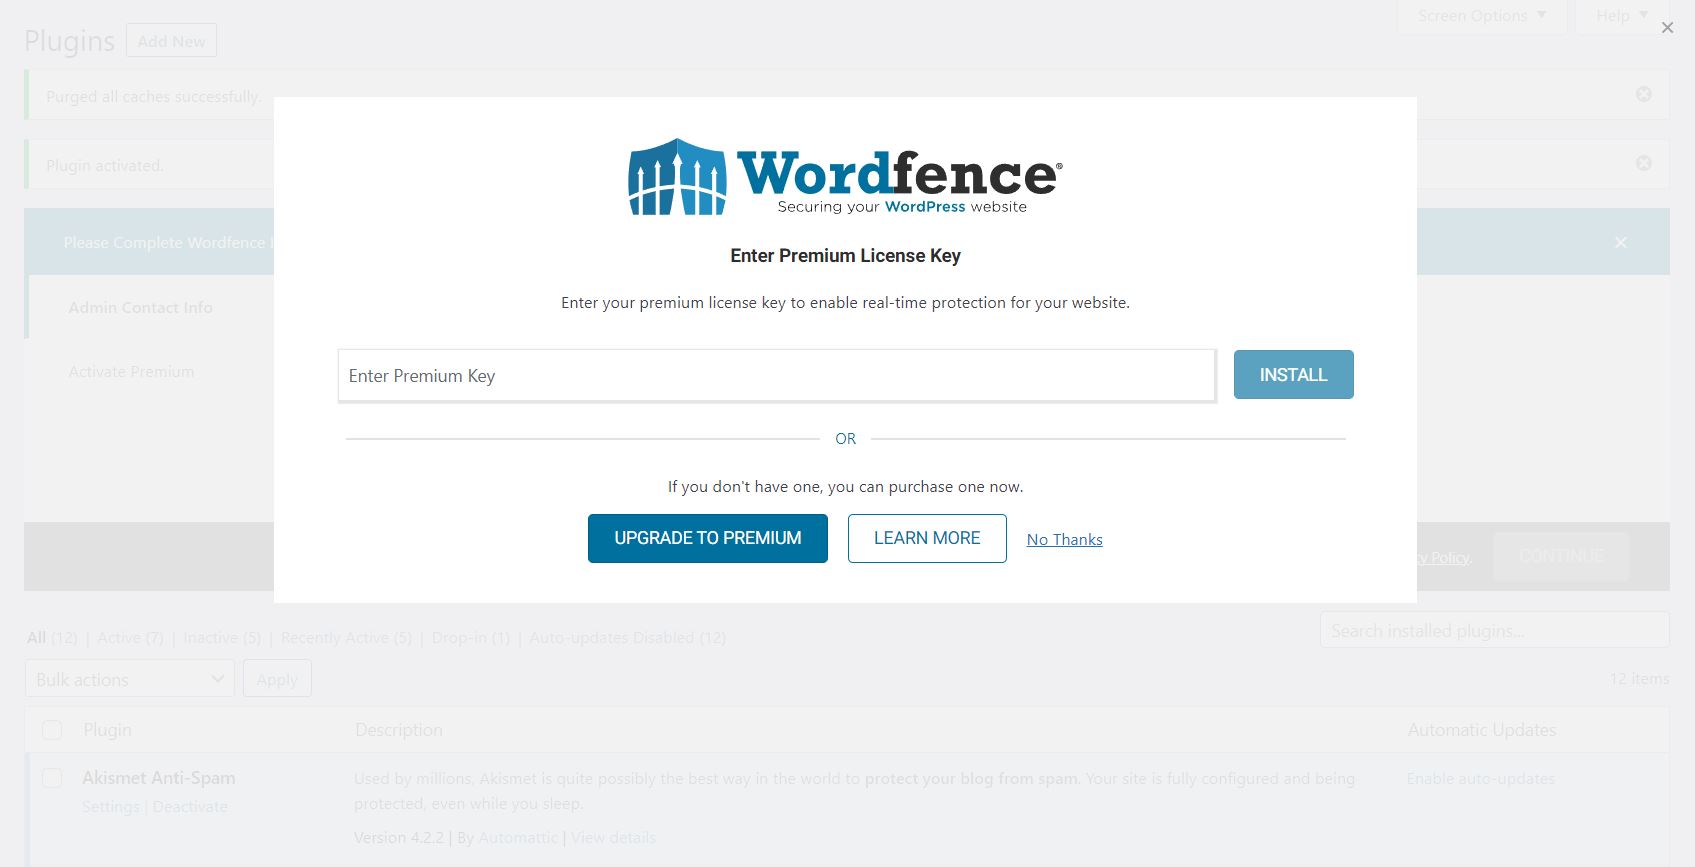
Wordfence is now installed and running on your WordPress website.
Note: To activate the Wordfence firewall and get the best security out of it, you need to configure Wordfence.
Wordfence Guide 2022 | Configuring Wordfence With The Best Settings
Wordfence is divided into 6 menus:
- Dashboard
- Firewall
- Scan
- Tools
- Login Security
- All Options
- Blocking and Live Traffic menus are disabled by default (see section 1 > view customization to enable it).
We will be selecting ‘All Options‘ and doing all the configuration there because everything under the other 5 sections (except for Login Security) is present in ‘All Options’.
Section 1: Wordfence Global Options

- Wordfence License – Has the license key for the free/paid version of Wordfence unique to your website.
- View Customization – This allows you to enable/disable the menu including all options, blocking, and live traffic. I follow the default option which is with only ‘all options’ enabled while the other two are disabled. You can see the live traffic menu from the ‘Tools’ menu and the blocking menu from the ‘Firewall’ menu.
Section 2: General Wordfence Options
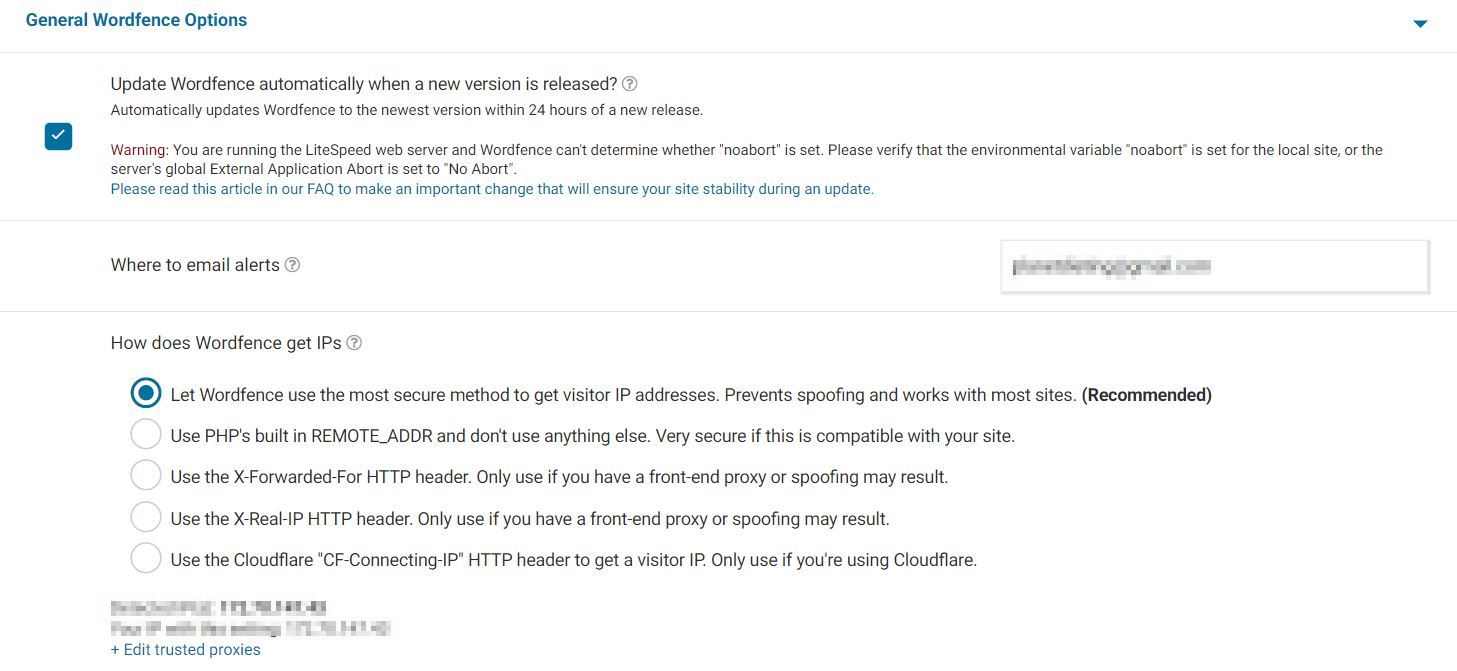
- Update Wordfence Automatically – Check (recommended)
- Add email to get website alerts on (you might have already provided it after installation)
- How does Wordfence get IPs – Check the option ‘Let Wordfence use the most secure method to get visitor IP addresses’ (recommended)
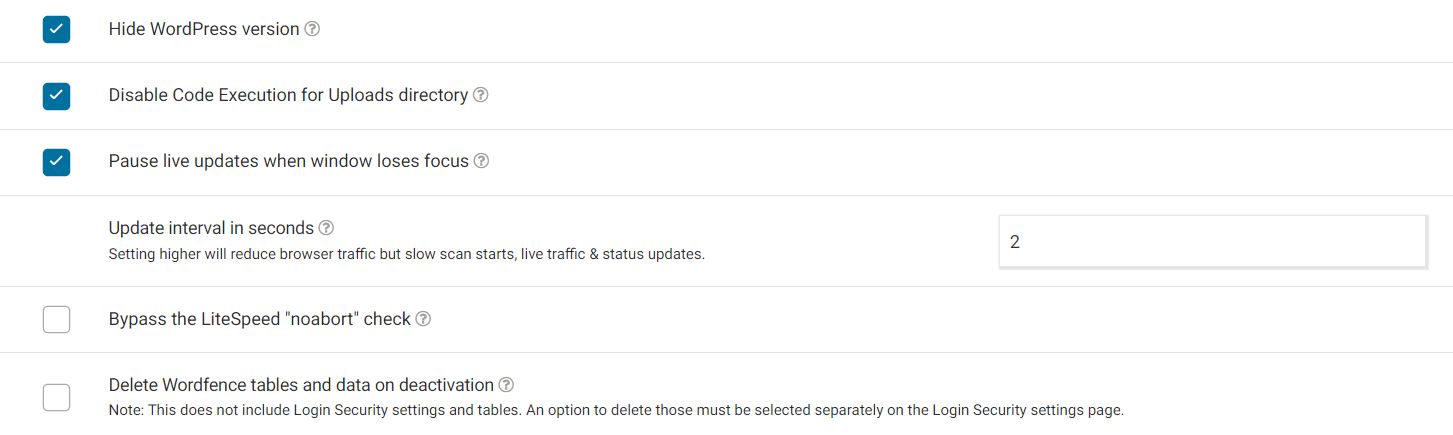
- Hide WordPress Version – Check (recommended)
- Disable Code Execution for Uploads directory – Check (recommended)
- Pause live updates when window loses focus – Check (help save your server resources and decrease plugin load)
- Update interval in seconds – I recommend it to get 5 to 10 secs if you have a server with less than 512MB RAM or on a shared hosting and leave it to the default 2 secs if you have a server with 1GB RAM or on dedicated/cloud/VPS hosting.
- Bypass the LiteSpeed “noabort” check – No need to check if you are no NGINX or Apache. Only for Litespeed servers. And for litespeed users, try checking the option if your schedule scans are failing/incomplete.
- Delete Wordfence tables and data on deactivation – Leave it uncheck
Section 3: Dashboard Notification Options

- Updates Needed (Plugin, Theme, or Core) – Optional, I uncheck it because WordPress already has this feature built-in. Plus, it confuses me most of the time because I only want to focus on the notifications from the scan status only.
- Scan Status – Check
Section 4: Email Alert Preferences
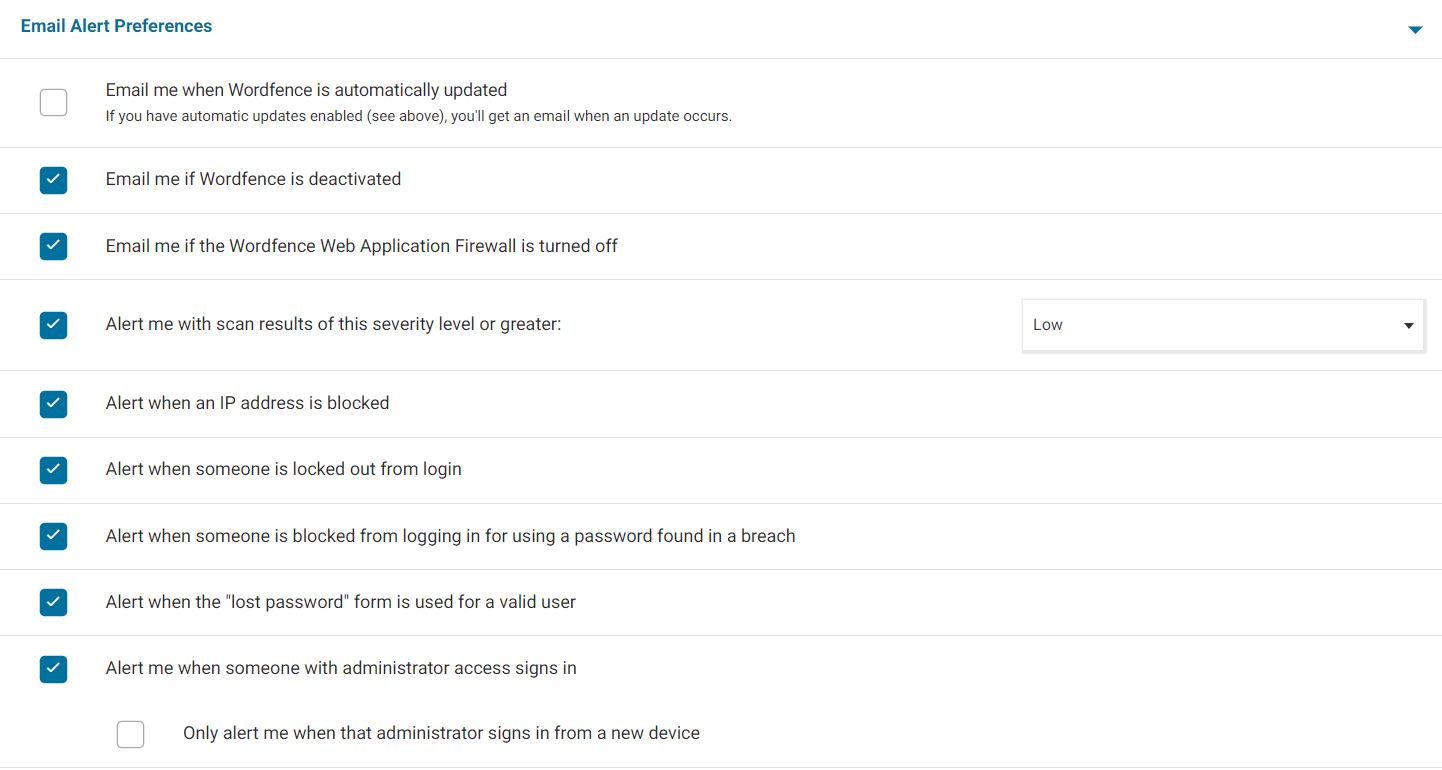

Wordfence is notorious for sending too many emails in the default settings. You can control the number of emails sent and the alerts for which the email is being sent.
- Email me when Wordfence is automatically updated – Uncheck (Optional, I don’t want to get an email every time when Wordfence is updated)
- Email me if Wordfence is deactivated – Check
- Email me if the Wordfence Web Application Firewall is turned off – Check
- Alert me with scan results of this severity level or greater: Low
- Alert when an IP address is blocked – Check
- Alert when someone is locked out from login – Check
- Alert when someone is blocked from logging in for using a password found in a breach – Check
- Alert when the “lost password” form is used for a valid user – Check
- Alert me when someone with administrator access signs in – Check
- Only alert me when that administrator signs in from a new device – Uncheck (optional, check if you have too many admins on your site)
- Alert me when a non-admin user signs in – Uncheck (You don’t want tons of emails to clutter your email dashboard even if a subscriber or contributor signs in)
- Only alert me when that user signs in from a new device – Uncheck (Same reason as above)
- Alert me when there’s a large increase in attacks detected on my site – Check
- Maximum email alerts to send per hour – I have set it to 0 (for unlimited) because I like to get notified of the above alerts ASAP. If the emails sent are too many, you can change to ‘1’ or ‘2’ emails sent per hour
Section 5: Activity Report
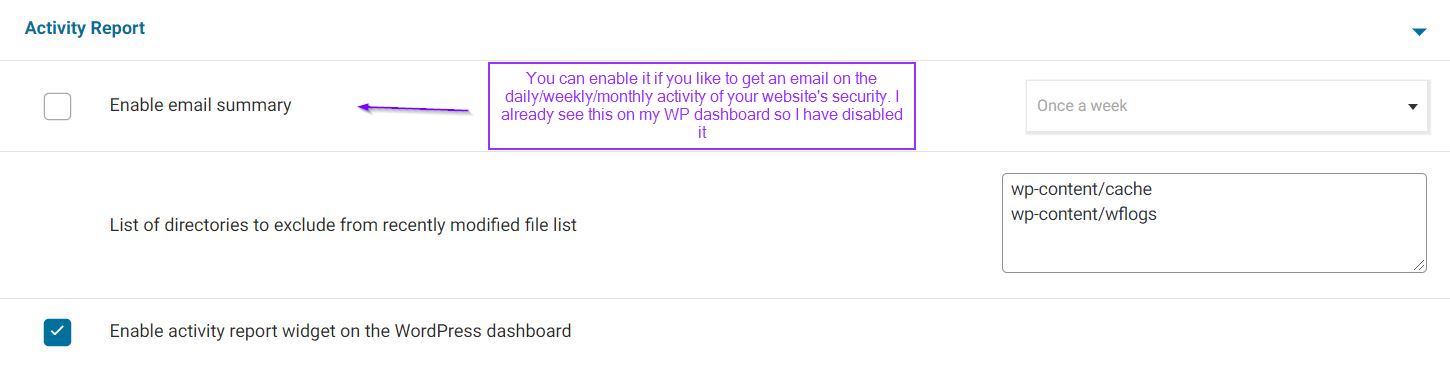
- Enable email summary – Uncheck (Optional, I don’t want Wordfence to email it to me as I already see the summary in the WP dashboard in the widgets section)
- List of directories to exclude from recently modified file list – Only exclude the cache section and wflogs (by default). If you have removed it somehow, here is the default exclusion:
wp-content/cache
wp-content/wflogs
Wordfence Guide | Setting up Your Firewall
Section 6: Firewall Options
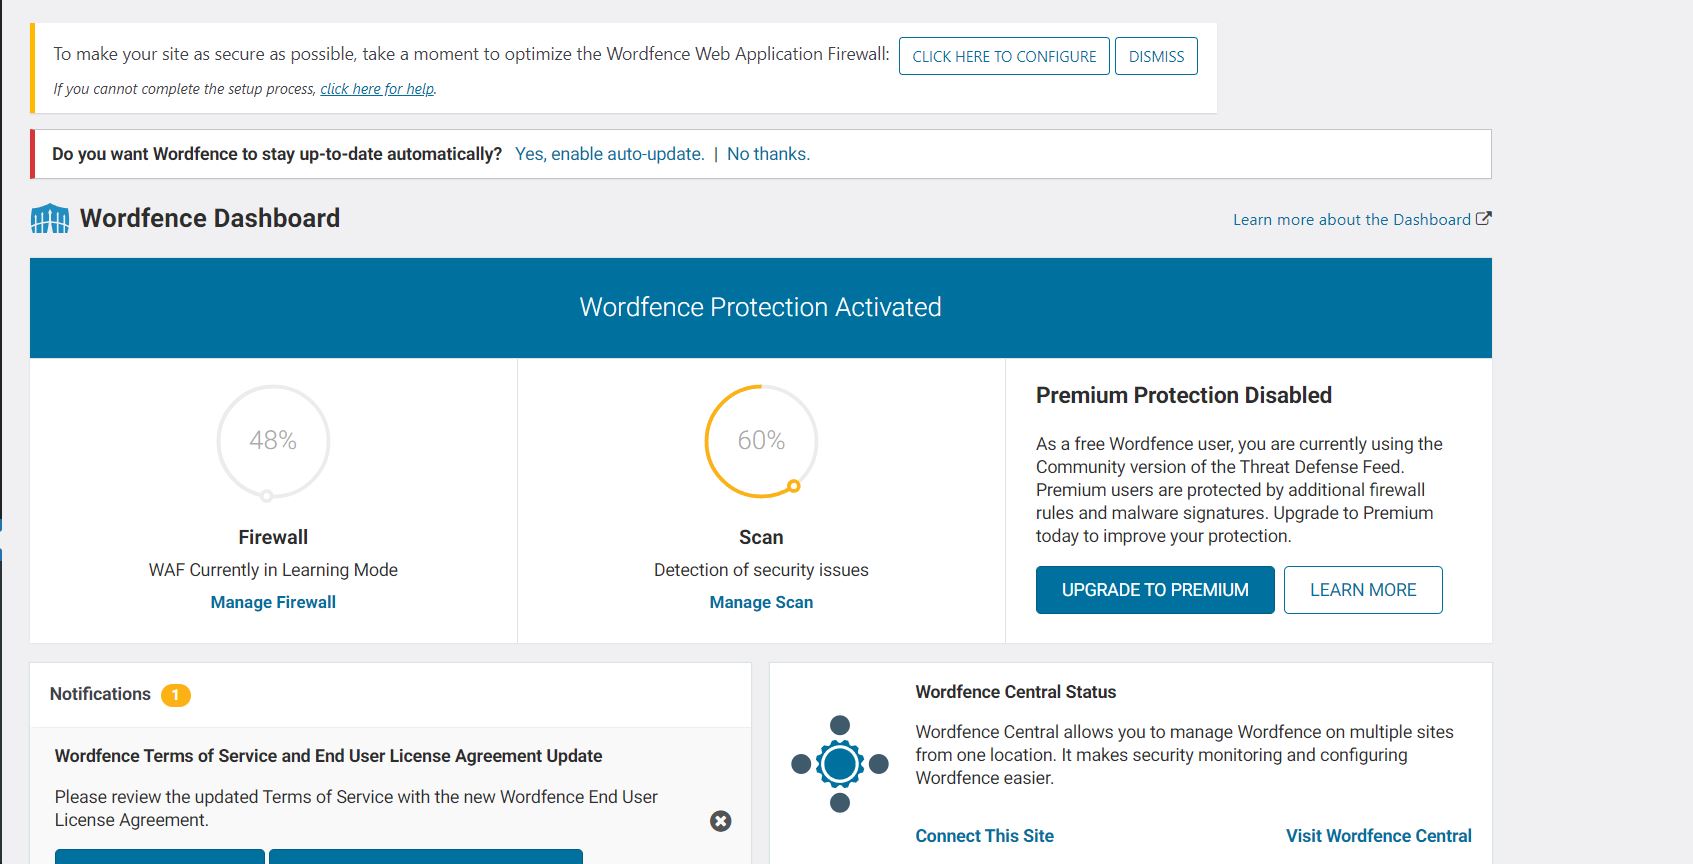
You might have seen the ‘Configure Firewall’ notification when you installed and activated Wordfence. Well, time to make that notification disabled.
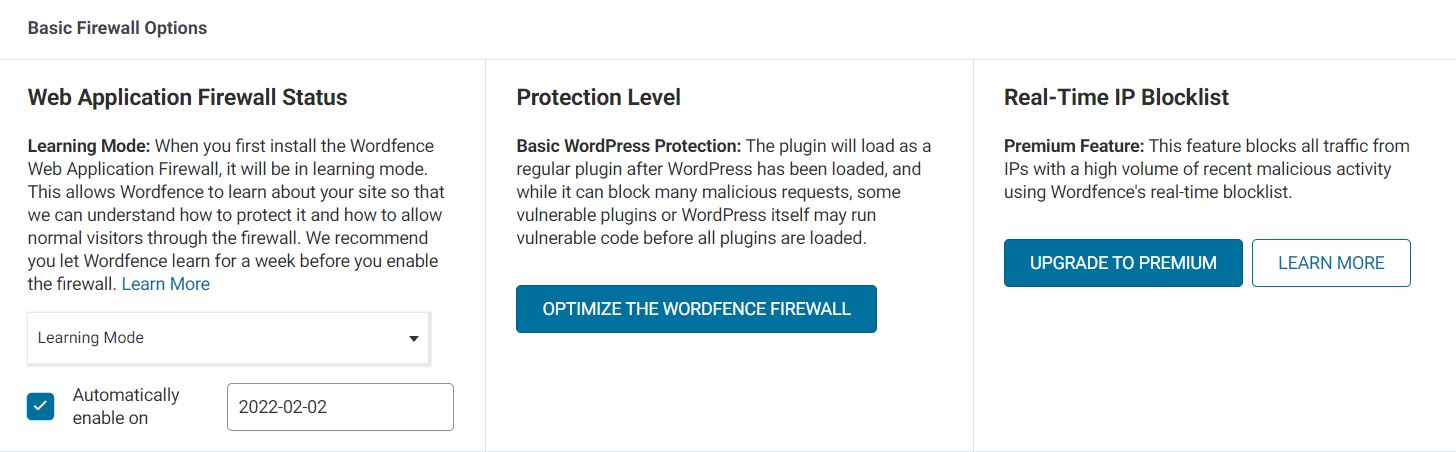
- Web Application Firewall Status – Learning Mode (by default) RECOMMENDED: For every website out there, learning mode is a MUST to be activated and at least for 5 days. I have seen many people reporting that Wordfence is blocking admin-ajax.php, and other files and giving false positives occasionally. The most common fault is that they switch from the default Learning Mode to Enabled and Protected right after installing Wordfence.
- Protection Level: Basic Protection Level (Cannot be changed in the Free version)
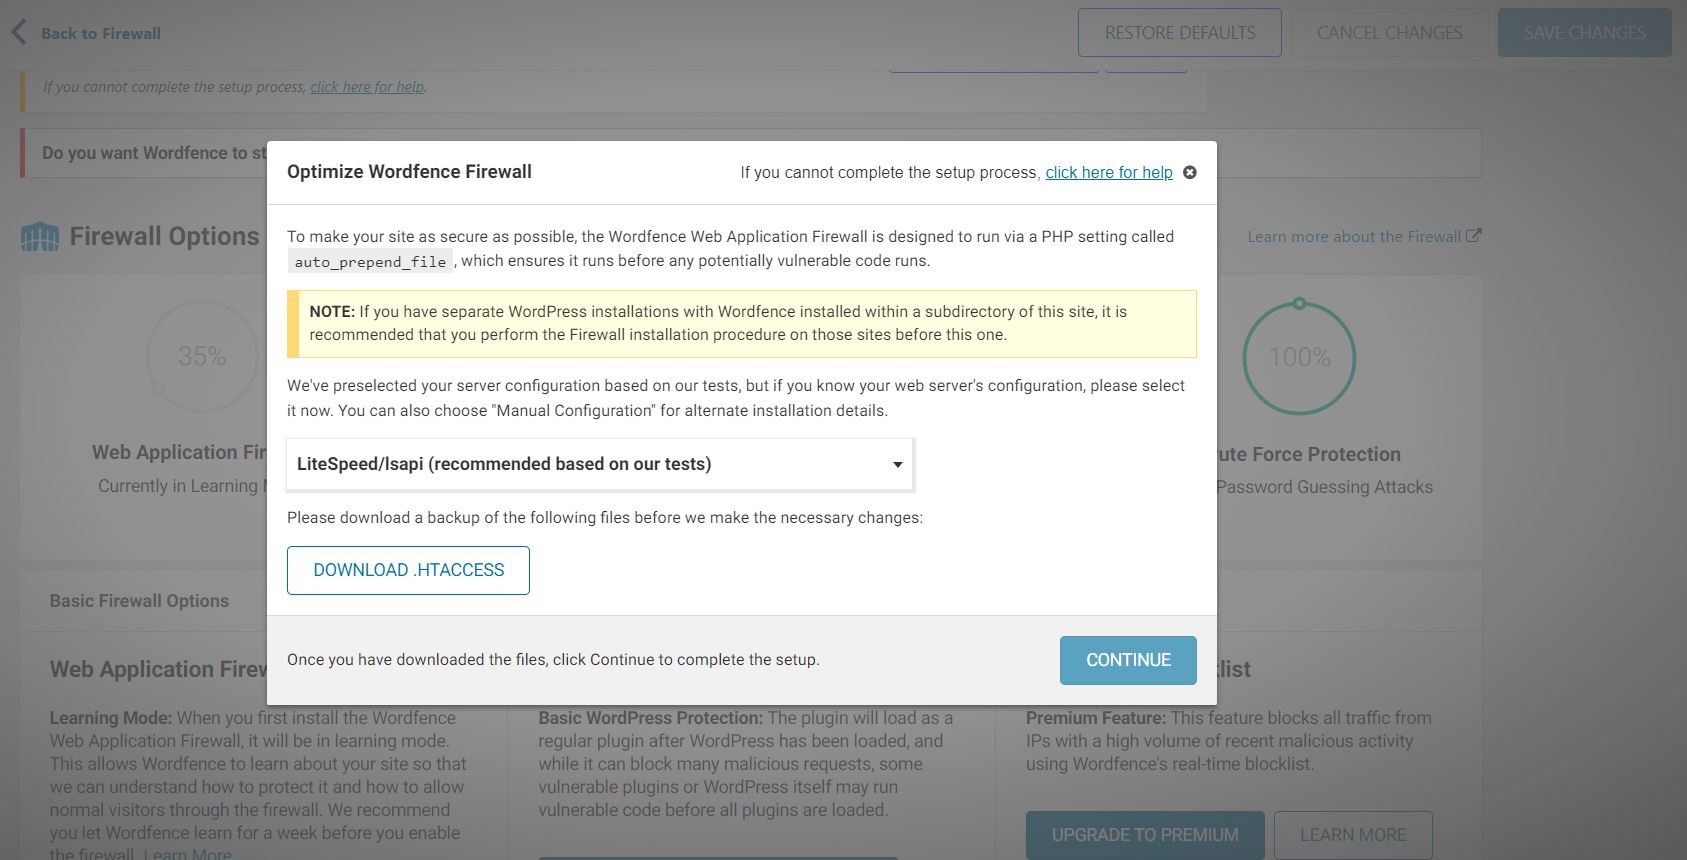
- Optimize the Wordfence Firewall Plugin – Usually, Wordfence automatically detects the server type and gives you the pre-selected option. Download the htaccess and user.ini file and click continue.
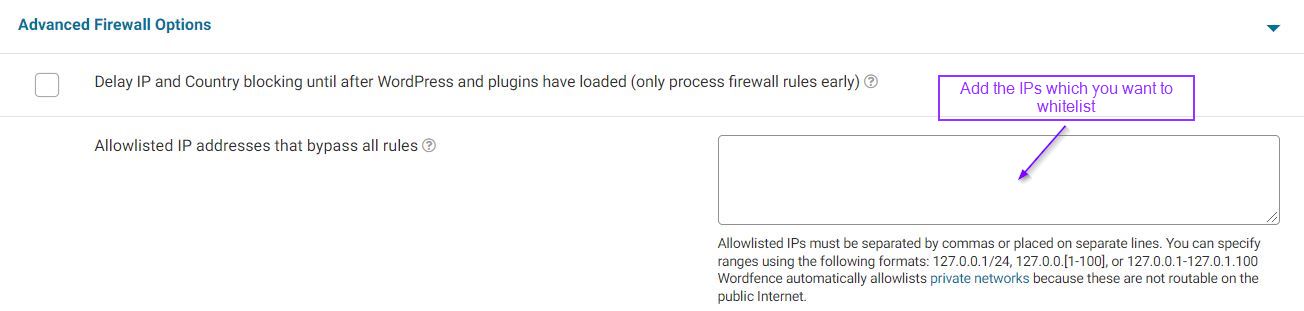
Section 7: Advance Firewall Options
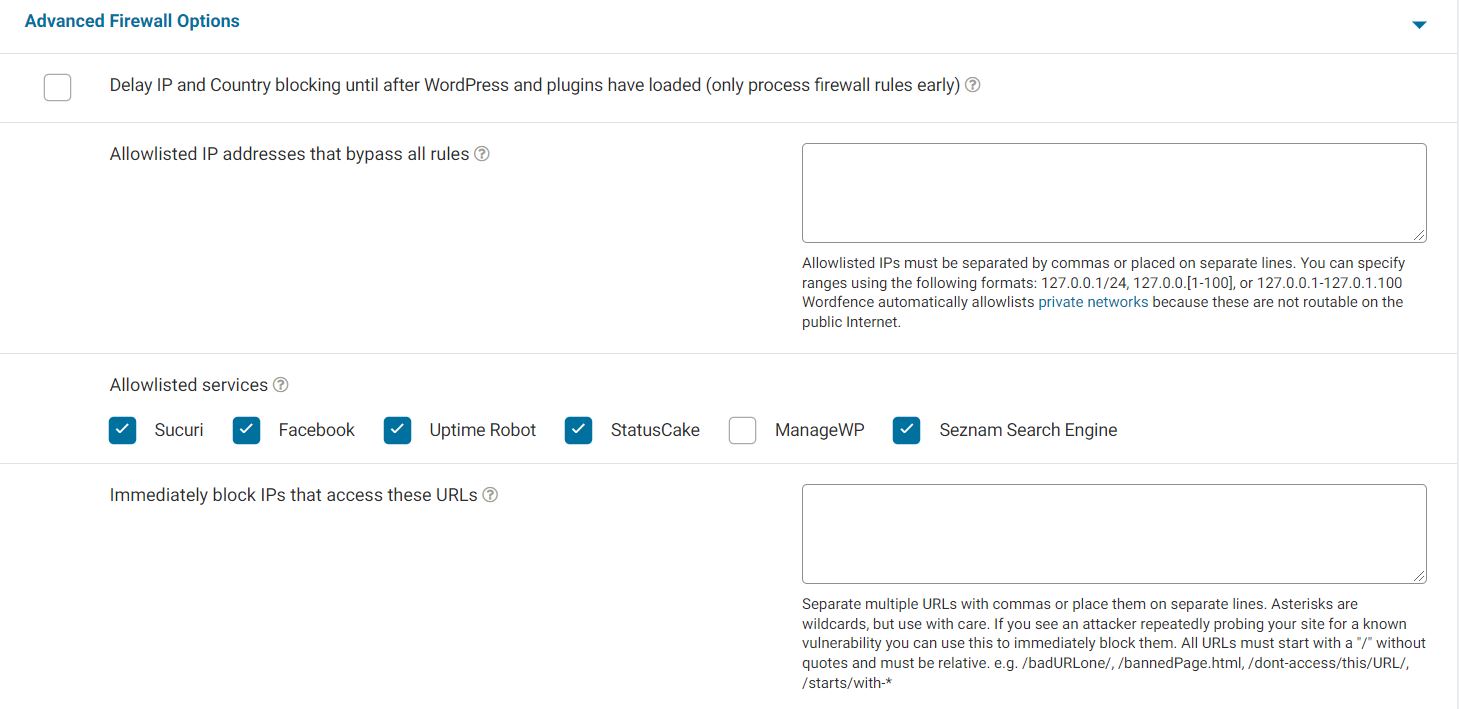

- Delay IP and Country blocking until after WordPress and plugins have loaded – Uncheck (never load your application firewall after everything else, unless you are testing something)
- Allowlisted IP addresses that bypass all rules – Leave it empty if you are running your internet on a public IP. Add your internet IP address if it’s private.
- Allowlisted services – Leave it to Default, if you uncheck any box you may block them from using their services on your WordPress especially if you have throttle crawlers in the ‘rate limiting’ section.
- Immediately block IPs that access these URLs – Leave it Empty. If you have any super confidential/private pages which you want a few IPs or yourself only to access, try adding such URLs to the list, but make sure to whitelist the IPs you want to allow in the ‘Allowlist IP’ section above.
- Ignored IP addresses for Wordfence Web Application Firewall alerting – Leave it Empty
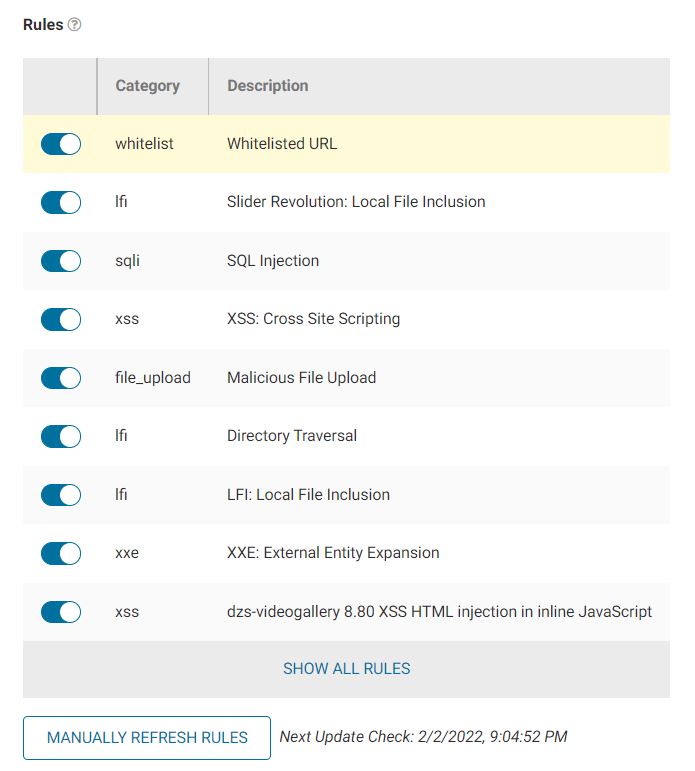
- Rules – Don’t change the default settings (All boxes must be checked)
Section 8: Brute Force Protection
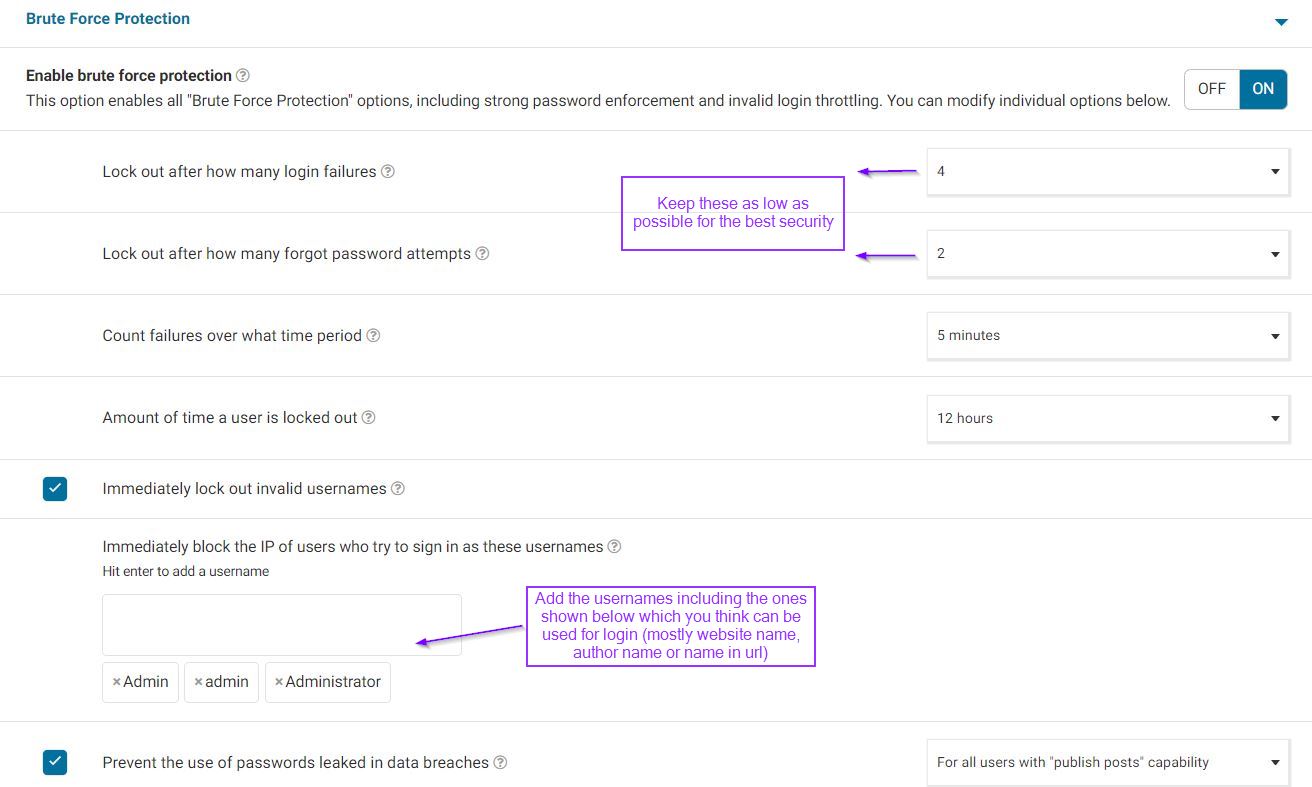
This feature should be turned ON because brute force attacks are the most common attacks on a WordPress website unless you have hidden your wp-login page to another custom URL.
- Enable brute force protection – ON
- Lock out after how many login failures – Set it to 2 to 5 (It’s rare to forget your own password)
- Lock out after how many forgot password attempts – Set it to 2 to 3
- Count failures over what time period – 5 minutes
- Amount of time a user is locked out – 12 hours to 1 day and even more
- Immediately lock out invalid usernames – Add names that you think that the bot or a human will enter for a login attempt. These are the most common usernames used and you can copy-paste the list to your website as well.
admin
Admin
Administrator
administrator
your website name (without any spacing)
Author/admin name(s) (without any spacing)
Must Read!
I have added admin, administration, and Admin to the list. If you have a username including one from the list, please change it before adding this list. Moreover, keeping the default username and similar is NOT RECOMMENDED at all. Add your own website, author, and admin name in the last two entries.
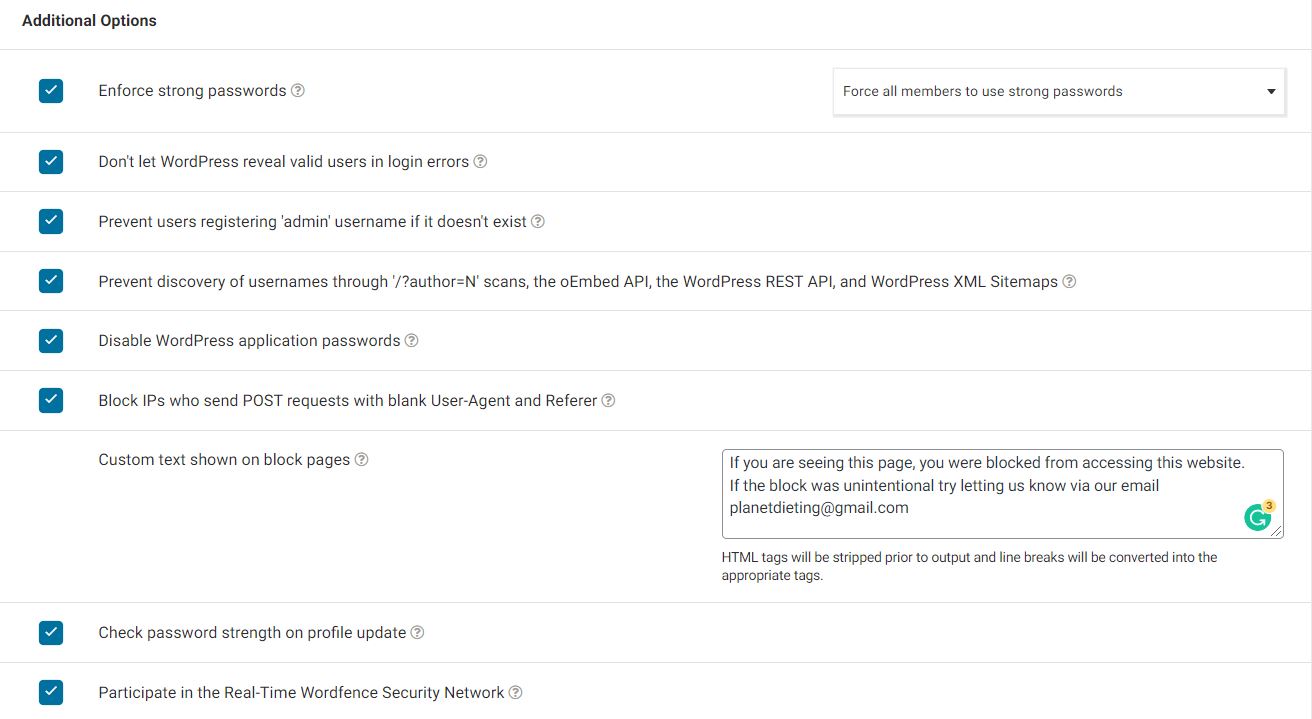
- Prevent the use of passwords leaked in data breaches – Check, For all users
- Enforce strong passwords – Check, Force for all members
- Don’t let WordPress reveal valid users in login errors – Check
- Prevent users registering ‘admin’ username if it doesn’t exist – Check
- Prevent discovery of usernames through ‘/?author=N’ scans, the oEmbed API, the WordPress REST API, and WordPress XML Sitemaps – Check
- Disable WordPress application passwords – Check
- Block IPs who send POST requests with blank User-Agent and Referer – Check
- Custom text shown on block pages – Leave it empty (Optional – add text such as ‘If you are seeing this page, you were blocked from accessing this website. If the block was unintentional try letting us know via our email yourname@example.com)
- Check password strength on profile update – Check
- Participate in the Real-Time Wordfence Security Network – Check (Optional, allows the website to send logs to the Wordfence website)
Wordfence Guide | How To Stop Bad Bots & Crawlers From Consuming Your Server Resources & Bandwidth
Section 9: Rate Limiting
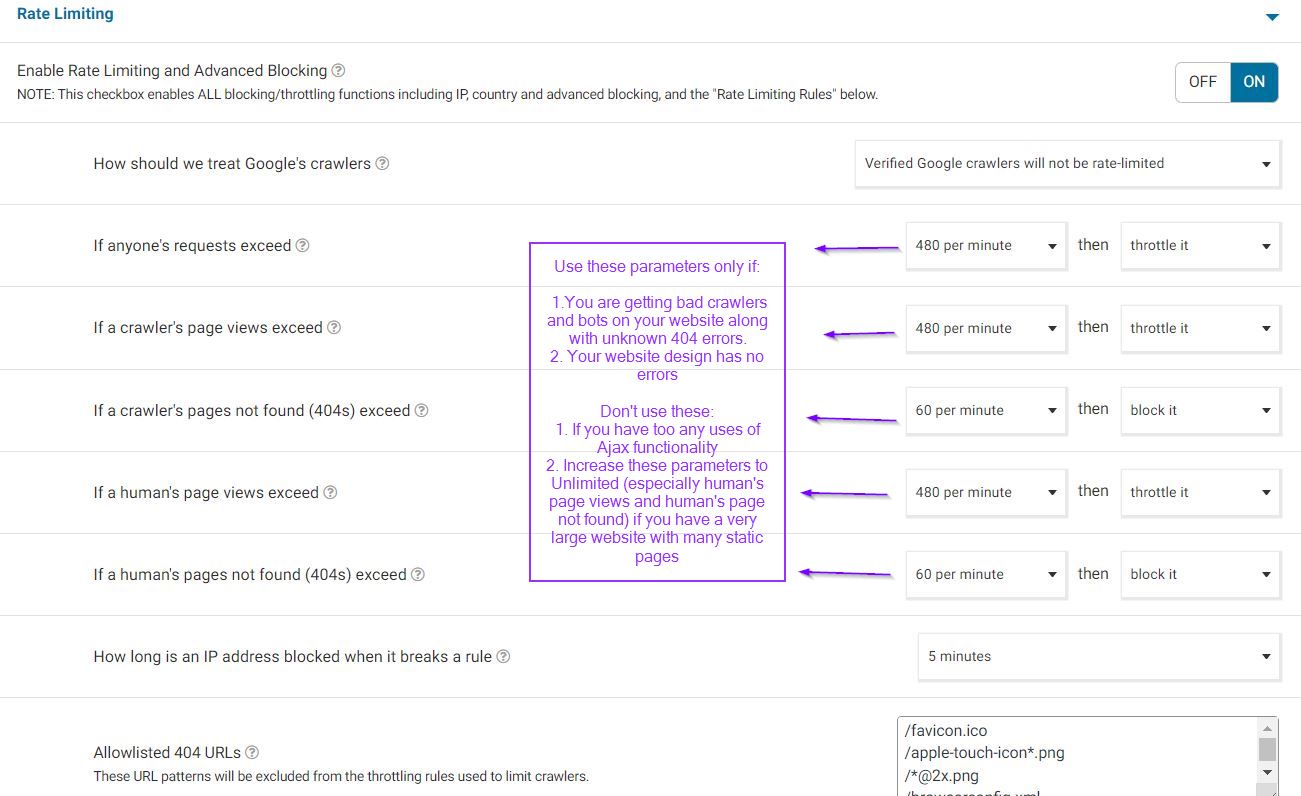
If your server/hosting plan has a limited bandwidth and expects many bots (bad ones) to utilize your server resources, do TURN ON this feature.
- Enable Rate Limiting and Advanced Blocking – ON
- How should we treat Google’s crawlers – Verified Google crawlers will not be rate-limited
- If anyone’s requests exceed – 480 per minute – Throttle it
- If a crawler’s page views exceed – 480 per minute – Throttle it
Read This Before Configuring Rate Limiting
For the other options mentioned below please make sure that your website is well-configured and does not show any 404 errors on normal functioning. You can check this by seeing your error logs in your browser or console.
- If a crawler’s pages not found (404s) – Unlimited (if the website is not properly configured) and 60 or even 30 per minute then Block (if the website is properly configured)
- If a human’s page views exceed – Unlimited (if the website is not properly configured or the website has too many AJAX requests or static pages or high traffic) and 480 or even 240 per minute then Throttle (if the website is properly configured and )
- If a human’s pages not found (404s) exceed – Unlimited (if the website is not properly configured) and 60 or even 30 per minute then Block (if the website is properly configured)
- How long is an IP address blocked when it breaks a rule – 5 minutes
- Allowlisted 404 URLs – Here’s the default list:
/favicon.ico
/apple-touch-icon*.png
/*@2x.png
/browserconfig.xml
Section 10: Allowlisted URLs
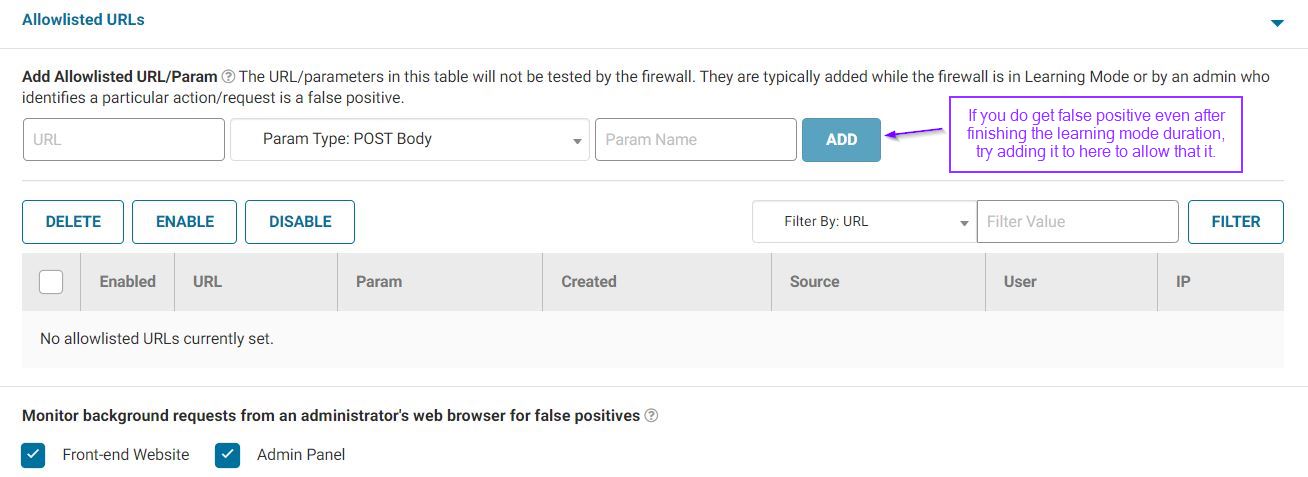

Leave it empty if you are not getting any false positives. Otherwise, add the URLs which are getting false positives here. Wordfence also adds URL here when in learning mode.

- Monitor background requests from an administrator’s web browser for false positives – Check both Front-end and Admin Panel
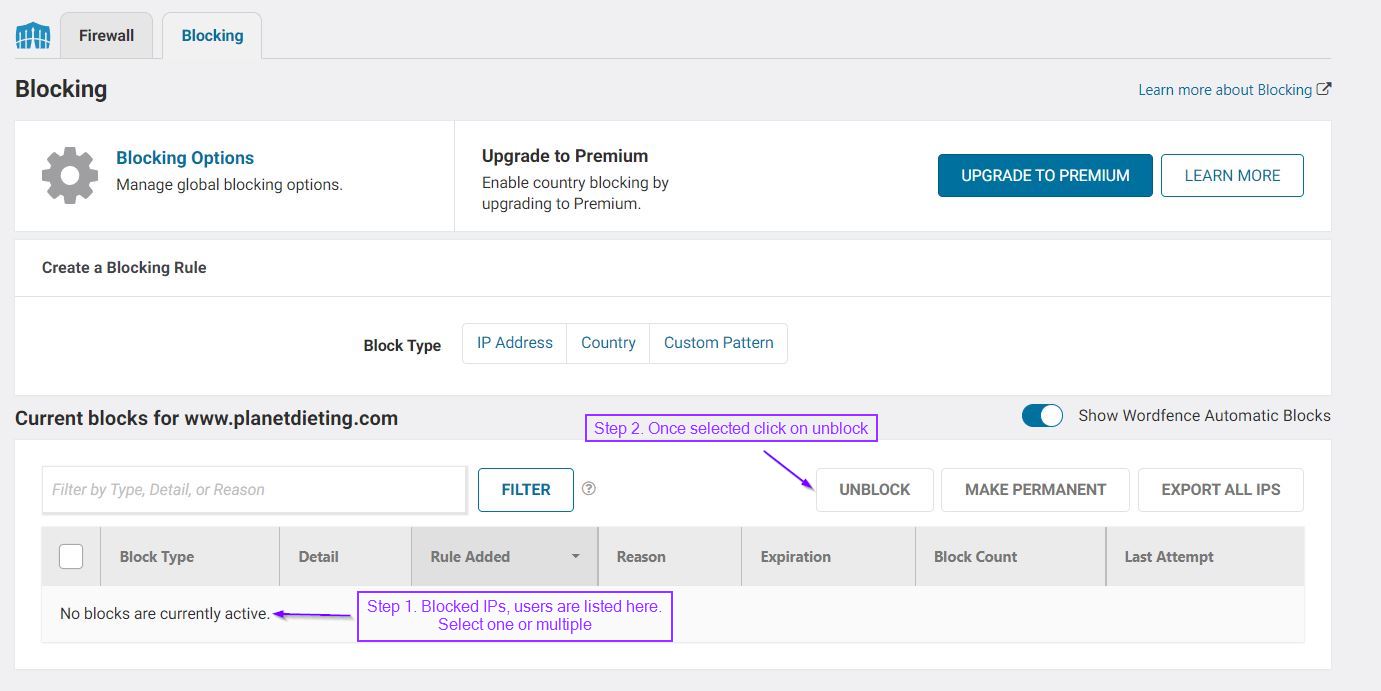
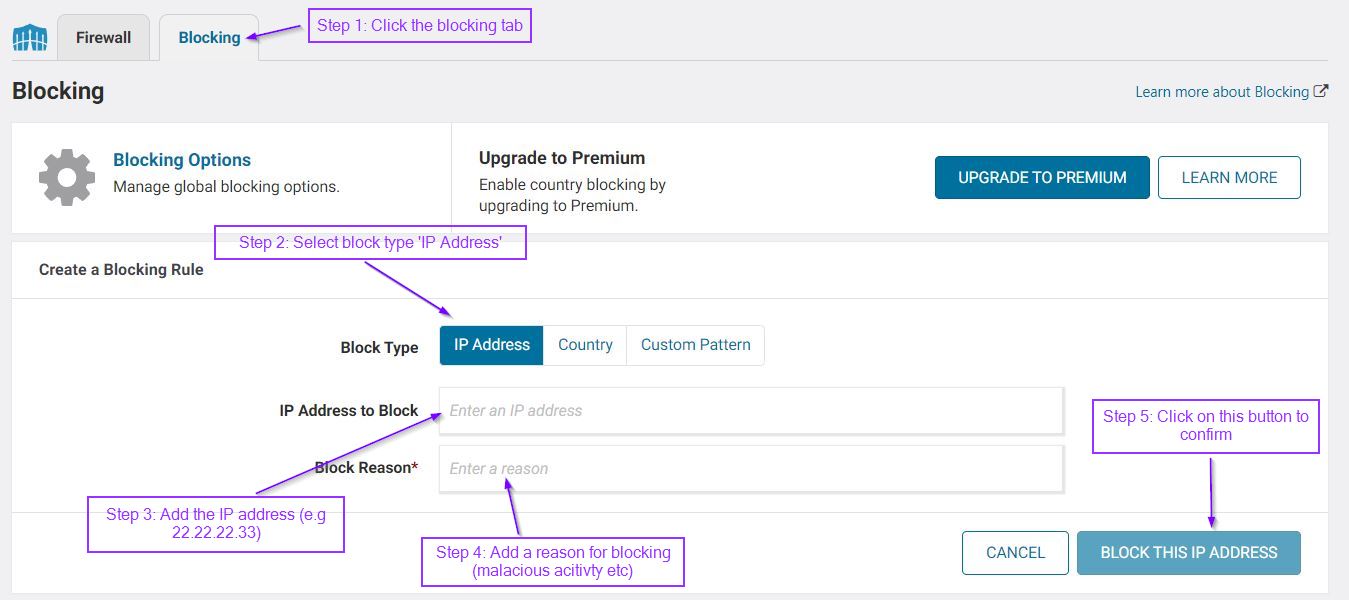
Section 11: Blocking Options
This is only available in the Paid version of Wordfence. It allows you to block users geographically (a country).
Wordfence Guide | Setting Scan Scheduling & Configuration
Section 12: Scan Options
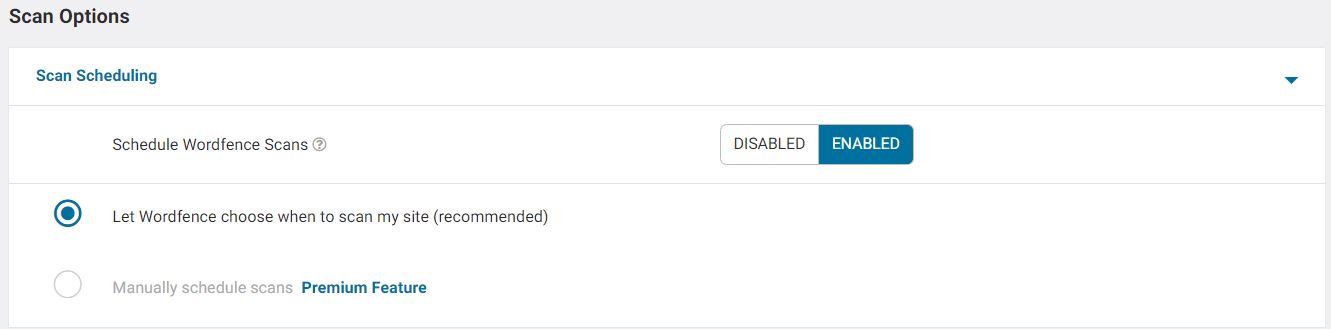

- Scan Scheduling – ENABLED
- Basic Scan Type Options – Standard Scan for daily scheduled scans. You can later change it to High-Sensitivity once a week or month and go to ‘Scan’ in the menu and click ‘Start a New Scan’. When completed, revert back to Standard Scan. For an old website newly moving to Wordfence, I recommend going for a high-Sensitivity scan for the first try.
Section 13: General Options
Don’t change this, they are set according to the scan type.
Section 14: Performance Options

- Use low resource scanning – Optional – Check this if you think that Wordfence is slowing your website or you are on a low-resource VPS/cloud with multiple websites or even shared hosting. However, checking this will also take longer times for the scan to be completed.
- Limit the number of issues sent in the scan results email – Optional – I have set it to the default 1000.
- Time limit that a scan can run in seconds – Leave it empty which means 3 hours for each scan. If you don’t want the server resources to be utilized for that long, you can also decrease it to 1 hour or even a few minutes if you have a powerful server.
Section 15: Advanced Scan Options
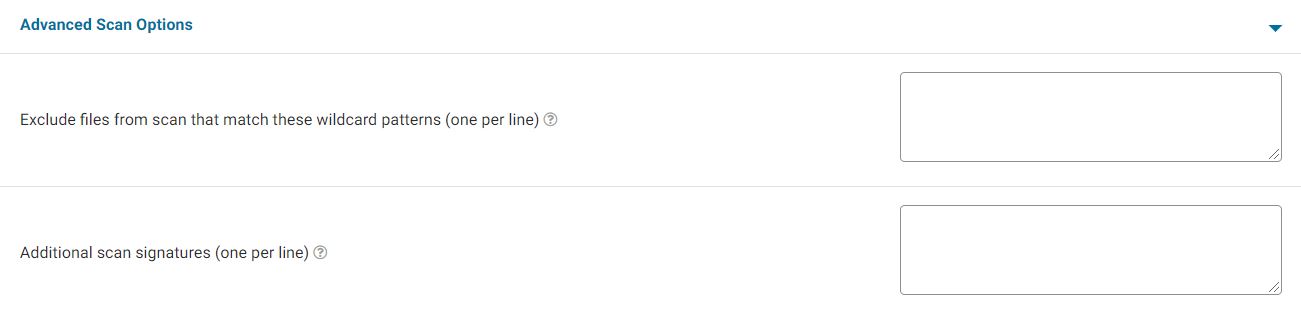
Leave it empty unless you want to exclude anything from the scan.
Wordfence Guide | Setting Live Traffic Configuration in Tool Options
Section 16: Live Traffic Options
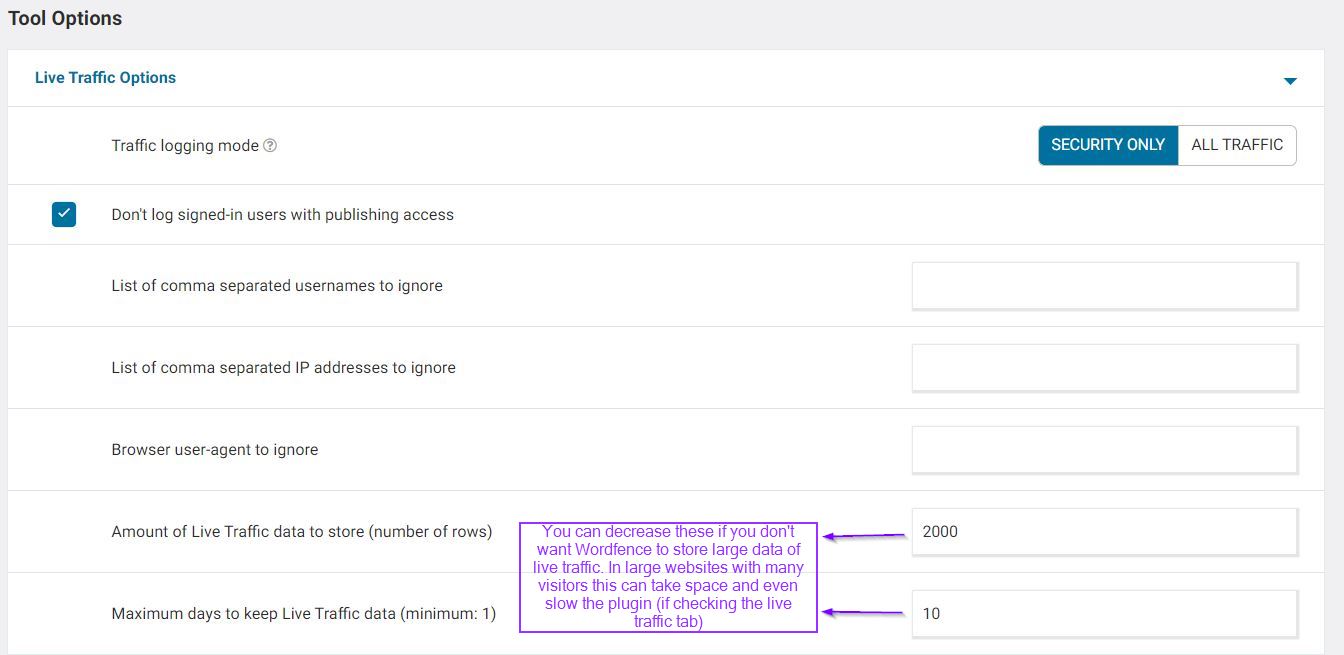
- Traffic logging mode – SECURITY ONLY (saves you the hassle to check the important from All traffic)
- Don’t log signed-in users with publishing access – Check
- List of comma-separated usernames to ignore – Empty
- List of comma-separated IP addresses to ignore – Empty or you can add your IP address if private to ignore in the live traffic
- Browser user-agent to ignore Amount of Live Traffic data to store (number of rows) – 2000
- Maximum days to keep Live Traffic data (minimum: 1) – 10 days (you can decrease or increase as your liking)
Wordfence Guide | How To Set Wordfence 2FA (two-factor authentication)
2FA is an in-built feature in Wordfence Security and unlike most security plugins out there you won’t have to install a separate login for that. 2FA is an extra and one of the most important steps in improving WordPress security.
| Apps supported by Wordfence For 2FA |
| Google Authenticator |
| Microsoft Authenticator |
| Authy 2-Factor Authentication |
| Sophos Mobile Security |
| FreeOTP Authenticator |
| 1Password (mobile and desktop versions) |
| LastPass Authenticator |
Here’s how to activate Wordfence 2FA:
- Go to Wordfence (in your WP menu on the left side) > Login Security
- Install any 2FA app on your device. I like Google Authenticator on my smartphone.
- From your Authenticator app, click Add or + button and select ‘Scan QR code‘
- Scan the QR code available on the ‘Two-Factor Authentication’ Page from Wordfence > Login Security from your other device
- Once done, the website with your username will be added to the Authenticator app.
Now when you will try to login into your website’s login screen, you will be asked a code that can be seen on that authenticator app.
Important! Do this before activating 2FA
Do download the recovery codes as a backup in case your device is lost. The codes can be downloaded from Wordfence > Login Security > Two-Factor Authentication Tab > Right Box
Some other tips regarding Wordfence 2FA:
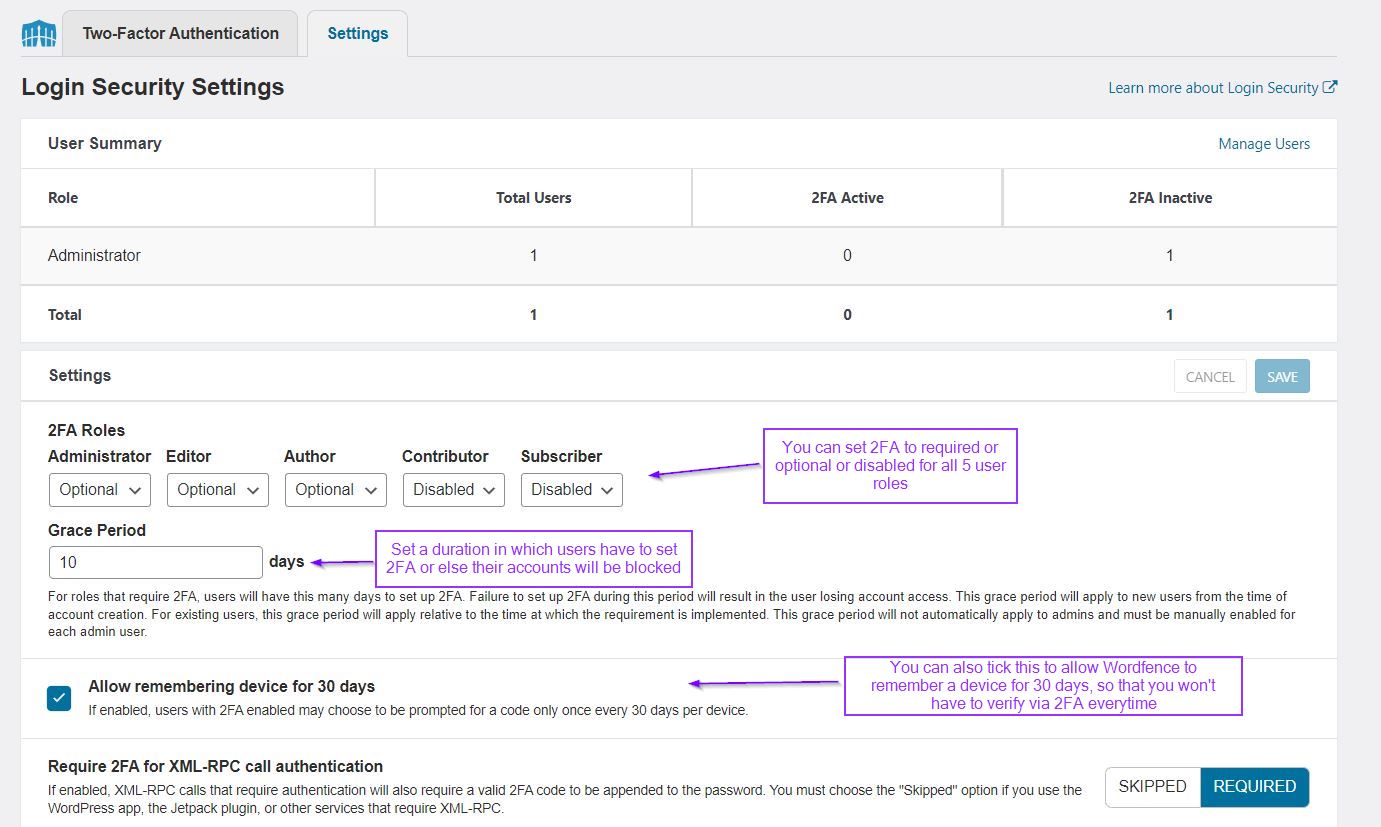
- From Wordfence > Login > Security > Settings tab, you can set 2FA Roles to all your user account types including Administrator, Editor, Author, and even Subscriber.
- You can make a 2FA mandatory for them and set a time limit in which they must set 2FA on their accounts or else their account access will be revoked. This can be done by selecting ‘Required’ under each ‘2FA role’ and setting a ‘Grace Period’
- You can also check ‘Allow remembering device for 30 days’ to prevent users from 2FA every time they try logging in.
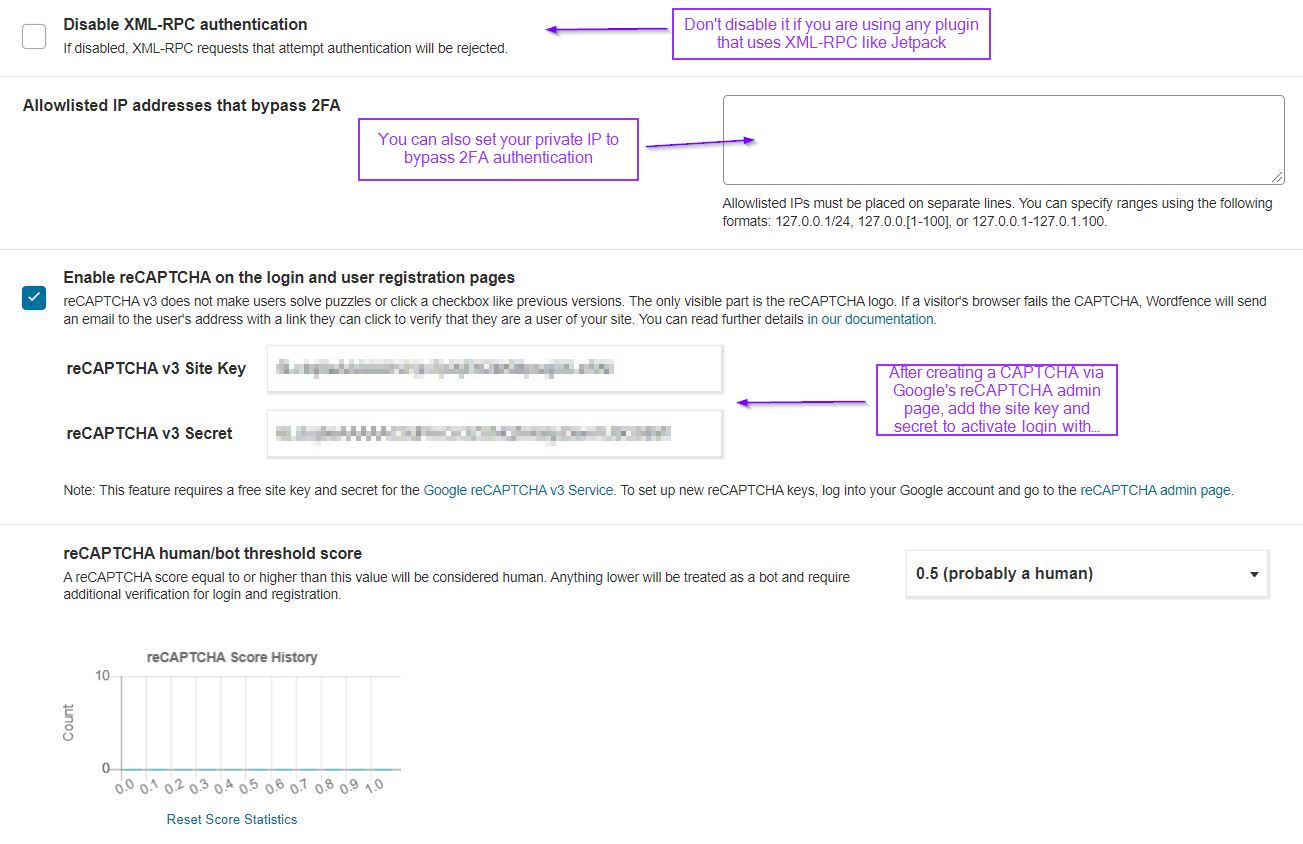
- You can also enable CAPTCHA on Wordfence login by checking the ‘Enable reCAPTCHA on the login and user registration pages’ box. You may need to go to the Google reCAPTCHA admin page and register the website there. It’s better to use Captcha v3 instead of the v2.
- If you are not using Jetpack or any other plugin that makes use of XML-RPC, disabling it by checking the ‘Disable XML-RPC authentication‘ box also adds a layer to your login security.
FAQs
I hope this Wordfence guide has provided you with the optimal settings you need to set the plugin. I’ll be writing separate posts on fixing errors that users frequently experience on Wordfence + ways to improve a Wordfence-slowed website. Moreover, I’ll also be writing a guide on achieving impenetrable WordPress security by combining Wordfence (application-level WAF) and Cloudflare (server-level WAF).
If you have any questions about this guide, be sure to comment in the comment section!